

Smooth Down There: How to Trim Your Bikini Area Without the Bumps (Ouch-Free!)
Introduction
Let’s be honest—shaving or trimming your bikini line can sometimes feel like walking through a minefield. One wrong move, and suddenly you’re dealing with angry red bumps, itchy ingrown hairs, and that awful burning sensation that makes you regret ever picking up a razor.
But here’s the good news: it doesn’t have to be this way.
With the right prep, tools, and technique, you can achieve a smooth, bump-free bikini area without the drama. No more hiding in sweatpants for days or slapping on weird home remedies that don’t work. Just soft, irritation-free skin—exactly how it should be.
So, if you’re tired of the post-trim struggle, keep reading. I’m sharing everything you need to know—from why those bumps happen in the first place to the best way to trim without turning your skin into a war zone.
Why Do Bikini Bumps Happen? (And How to Stop Them Before They Start)
Before we dive into the how, let’s talk about the why. Understanding what causes those annoying bumps is the first step to preventing them.
1. Ingrown Hairs – The Sneaky Culprit
When you trim or shave, the hair can sometimes curl back into the skin instead of growing outward. This traps it under the surface, causing red, inflamed bumps—aka ingrown hairs. Coarse or curly hair is especially prone to this.
2. Dull Blades = Disaster
Using a dull razor or trimmer? Big mistake. A worn-out blade tugs at hairs instead of cutting them cleanly, leading to micro-tears in the skin and irritation.
3. Dry Shaving (Aka Skin Sabotage)
Trimming or shaving without any lubrication is like rubbing sandpaper on your skin. It creates friction, which leads to redness, bumps, and even tiny cuts.
4. Skipping Aftercare = Regret
If you trim and then immediately throw on tight underwear or hit the gym, you’re basically inviting bumps to the party. Sweat and friction irritate freshly trimmed skin, making everything worse.
Now that we know the enemies, let’s talk about how to fight back.
The Right Tools for a Bump-Free Trim
Not all trimmers are created equal. If you’ve been using a cheap disposable razor or an old electric trimmer that pulls more than it cuts, it’s time for an upgrade.
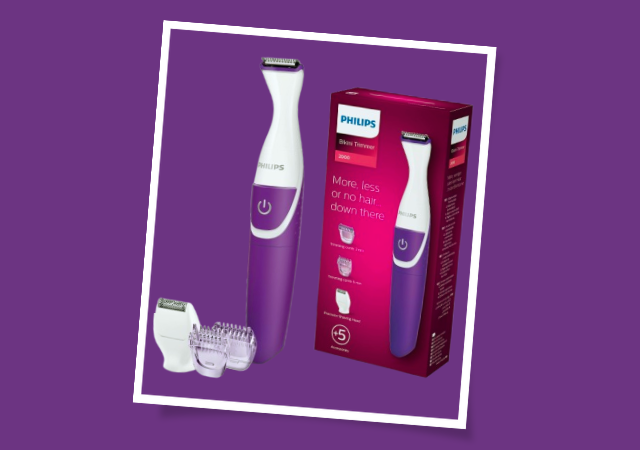
Electric Trimmer > Razor (Here’s Why)
Razors can give you a super close shave, but they also increase the risk of razor burn and ingrown hairs. A good electric trimmer, on the other hand, cuts hair without scraping your skin. Look for one with:
-
Hypoallergenic blades (less irritation)
-
Adjustable guards (so you can control length)
-
Waterproof design (for easy cleaning & wet/dry use)
Some top-rated options include the Philips BikiniGenie and the Braun Silk-épil 9—both gentle yet effective.
If You Must Use a Razor…
If you prefer a razor for that ultra-smooth feel, at least make sure it’s:
-
Sharp (replace blades every 5-7 uses)
-
Single-blade or safety razor (fewer passes = less irritation)
-
Used with a hydrating shave gel (never dry!)
The Step-by-Step, Bump-Free Bikini Trim Routine
Okay, now for the real magic—how to actually trim without turning your bikini line into a bumpy mess. Follow these steps, and your skin will thank you.
Step 1: Prep Like a Pro
Before you even think about trimming, exfoliate. A gentle scrub or chemical exfoliant (like glycolic acid) helps remove dead skin cells so hairs can grow out freely, reducing ingrown risks.
Then, soften the hair with warm water. Trimming right after a shower is ideal because the steam opens up hair follicles, making everything easier.
Step 2: Lube It Up
Never, ever trim dry. Apply a lightweight oil, shaving cream, or even conditioner to create a smooth surface for your trimmer or razor to glide over.
Step 3: Trim With the Grain First
This is where most people go wrong. Going against the grain might give you a closer trim, but it also increases irritation. Instead:
-
Start by trimming in the direction of hair growth
-
If you want a closer finish, go lightly against the grain on a second pass—but don’t press hard
Step 4: Rinse & Soothe
Once you’re done, rinse with cool water to close pores. Then, pat dry (no rubbing!) and apply aloe vera gel or witch hazel to calm the skin.
Step 5: Moisturize (But Choose Wisely)
Skip heavy, fragranced lotions—they can clog pores. Instead, use a light, fragrance-free moisturizer or a post-trim serum designed to prevent ingrown hairs.
Post-Trim Care: How to Keep Bumps Away
Your job isn’t done after trimming. To keep bumps at bay, follow these aftercare must-dos:
-
Avoid tight clothing for at least 24 hours (let your skin breathe!)
-
Skip intense workouts for a day (sweat = irritation)
-
Exfoliate 2-3 times a week to prevent ingrown hairs
-
Reapply moisturizer daily to keep skin hydrated
Biggest Mistakes That Cause Bumps (And How to Avoid Them)
Even with the best routine, a few slip-ups can ruin everything. Here’s what NOT to do:
-
Using old, dull blades (replace them regularly!)
-
Skipping exfoliation (leads to trapped hairs)
-
Trimming too often (give your skin time to recover)
-
Ignoring irritation (if your skin is red, take a break)
Final Thoughts: (Smooth Down There: How to Trim Your Bikini Area Without the Bumps (Ouch-Free!)
Trimming your bikini area shouldn’t be a painful guessing game. With the right tools, technique, and aftercare, you can keep things smooth without the bumps, redness, or regret.
So next time you reach for that trimmer, remember: prep, lube, go slow, and treat your skin kindly afterward. Your future self (and your bikini line) will thank you.
Got Questions? (Smooth Down There: How to Trim Your Bikini Area Without the Bumps (Ouch-Free!)
Q: How long do bikini bumps usually last?
A: If left alone, they typically fade in 3-5 days. But with proper care (exfoliation + moisturizing), you can speed up healing.
Q: Can I use deodorant to prevent bumps?
A: Some people swear by it, but stick to alcohol-free formulas to avoid drying out your skin.
Q: How often should I replace my trimmer blades?
A: Every 3-6 months, depending on use. Dull blades = irritation!

My name is Rohit Vagh and I’m a content writer specializing in fashion and lifestyle. I have three years of experience in this field and have written various articles. My writing style is creative and engaging, and I strive to create content that resonates with my readers. I have a deep passion for fashion and am constantly researching the latest trends and styles to make sure my readers are up to date. I’m excited to continue my career in blogging, and I’m always looking for new opportunities in the fashion and lifestyle space.


