Nail Buffing Secrets Revealed: Get Glossy, Healthy Nails DIY Style!
Introduction
Welcome to the ultimate guide for achieving glossy, healthy nails from the comfort of your own home! In a world where self-care is paramount, nail buffing emerges as a simple yet effective technique to elevate your nail game. Say goodbye to dull, lackluster nails and hello to a radiant, salon-worthy finish! Nail buffing isn’t just about aesthetics; it’s a holistic approach to nail care that promotes circulation and boosts nail health.
In this comprehensive guide, we unveil the secrets of nail buffing, empowering you to take control of your nail care routine like never before. From understanding the tools of the trade to mastering the art of buffing, we’ll walk you through each step with clarity and ease. Get ready to unleash the potential of your nails, turning them into stunning works of art that reflect your style and personality. It’s time to shine bright with DIY nail buffing – let’s embark on this transformative journey together!
Nail Buffing Secrets Revealed: Get Glossy, Healthy Nails DIY Style!
Understanding Nail Buffing:
Before we dive into the nitty-gritty of nail buffing, let’s take a moment to understand what it is and why it’s important. Nail buffing involves the use of specialized tools to gently smooth the surface of the nails, removing ridges, stains, and imperfections. This process not only improves the appearance of the nails but also promotes blood circulation to the nail bed, which can stimulate nail growth and overall nail health.
The Benefits of Nail Buffing:
The benefits of nail buffing extend far beyond aesthetics. Here are some of the key advantages:
- Enhanced Appearance: Buffing your nails can instantly give them a polished and well-groomed look, making them appear shiny and healthy.
- Improved Blood Circulation: The massaging action involved in nail buffing promotes blood circulation to the nail bed, which can encourage nail growth and strengthen the nails.
- Promotes Nail Health: By removing ridges and unevenness from the nail surface, buffing can help prevent nail breakage and splitting, keeping your nails strong and resilient.
- Stress Relief: The act of buffing your nails can be surprisingly therapeutic, providing a moment of relaxation and self-care in your busy day.
Preparing for Nail Buffing:
Before you begin the nail buffing process, it’s essential to gather the necessary tools and prepare your nails properly:
- Tools: You’ll need a nail buffer, cuticle oil or cream, a nail file, and hand cream.
- Clean Nails: Start by removing any old nail polish and trimming your nails to the desired length. Use a cuticle pusher to gently push back the cuticles, and then wash your hands thoroughly to remove any dirt or debris.
Steps for Nail Buffing:
Now that your nails are prepped and ready, let’s walk through the steps for nail buffing:
- Filing: Begin by shaping your nails using a nail file. Choose a file with a fine grit to avoid damaging the nails, and file them to your desired shape, whether it’s square, oval, or almond.
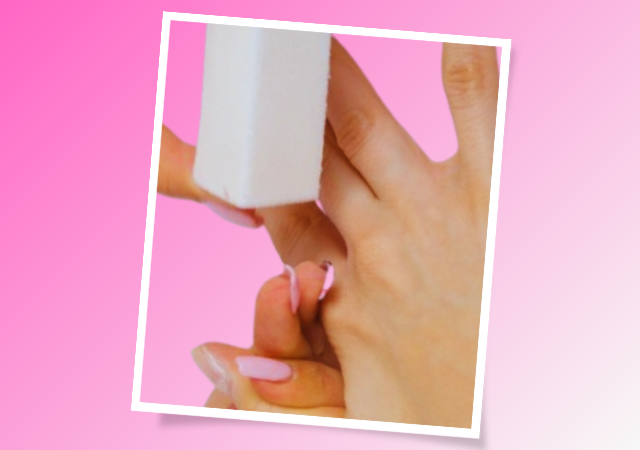
- Buffing: Next, take your nail buffer and start with the coarsest side. Hold the buffer firmly but gently, and buff each nail in small, circular motions. Pay attention to the entire nail surface, including the edges and corners, to ensure a smooth and even finish. Once you’ve buffed all your nails with the coarse side, repeat the process with the finer sides of the buffer for a glossy shine.
- Shining: To add an extra touch of brilliance to your nails, use the shiner side of the buffer. Buff each nail in a circular motion, applying gentle pressure to bring out their natural shine. This step will leave your nails looking glossy and radiant, with a salon-quality finish.
Tips for Effective Nail Buffing:
While nail buffing is a relatively straightforward process, there are a few tips to keep in mind to ensure optimal results:
- Avoid Over-Buffing: Buff your nails gently and avoid applying too much pressure, as this can thin out the nail plate and weaken the nails over time.
- Buff in One Direction: Always buff your nails in the same direction to prevent damage and ensure a smooth finish.
- Be Gentle with the Cuticles: Avoid buffing the cuticles themselves, as this can cause irritation and damage to the delicate skin around the nails.
- Moisturize After Buffing: After buffing your nails, apply a generous amount of hand cream or cuticle oil to hydrate and nourish the nails and surrounding skin.
Common Mistakes to Avoid:
To get the most out of your nail buffing routine, it’s essential to avoid these common mistakes:
- Buffing Too Vigorously: Buffing your nails too aggressively can strip away layers of the nail plate and weaken the nails.
- Using an Old or Worn-Out Buffer: Make sure to replace your nail buffer regularly to ensure optimal performance and results.
- Skipping Moisturization: Hydrating your nails and cuticles after buffing is crucial to keep them healthy and prevent dryness and brittleness.
- Neglecting Nail Health: While nail buffing can improve the appearance of your nails, it’s essential to prioritize overall nail health by maintaining a balanced diet, staying hydrated, and avoiding harsh chemicals and excessive use of nail products.
Frequently Asked Questions (FAQs):
Here are answers to some common questions about nail buffing:
- How often should I buff my nails? It’s generally recommended to buff your nails once or twice a month to maintain their health and appearance.
- Can I buff artificial nails? While you can buff some types of artificial nails, such as gel or acrylic, it’s essential to follow the manufacturer’s instructions and be cautious to avoid damaging them.
- Is nail buffing suitable for everyone? Nail buffing is generally safe for most people, but individuals with weak or damaged nails should consult a dermatologist or nail care professional before buffing.
- Can I buff my nails if they are weak or damaged? If your nails are weak or damaged, it’s best to avoid buffing them until they have healed. Instead, focus on nourishing and strengthening treatments to improve their condition.
Conclusion (Nail Buffing Secrets Revealed: Get Glossy, Healthy Nails DIY Style!)
Nail buffing is a simple yet powerful technique that can help you achieve glossy, healthy nails right at home. By following the steps outlined in this guide and incorporating nail buffing into your regular self-care routine, you can enjoy beautiful, salon-worthy nails that radiate health and vitality. So why wait? Grab your nail buffer and get ready to reveal the secrets of nail buffing for yourself!

My name is Rohit Vagh and I’m a content writer specializing in fashion and lifestyle. I have three years of experience in this field and have written various articles. My writing style is creative and engaging, and I strive to create content that resonates with my readers. I have a deep passion for fashion and am constantly researching the latest trends and styles to make sure my readers are up to date. I’m excited to continue my career in blogging, and I’m always looking for new opportunities in the fashion and lifestyle space.