How To Clean An Electric Shaver Blade
Introduction
Maintaining a clean electric shaver blade is crucial not only for optimal performance but also for personal hygiene and the longevity of your grooming tool. A dirty shaver can harbor bacteria, irritate the skin, and compromise the efficiency of the cutting elements. This guide will walk you through the step-by-step process of effectively cleaning your electric shaver blade. Whether you’re a daily shaver or occasional groomer, investing a few minutes in proper cleaning can make a significant difference in the quality of your shave.
From gathering the necessary materials to disassembling, cleaning, and reassembling the shaver, we’ll cover essential tips to ensure your electric shaver remains in top-notch condition. Say goodbye to clogged blades and welcome a cleaner, more efficient shaving experience with our comprehensive guide on how to clean an electric shaver blade.
Importance of Regular Cleaning:
Before we dive into the cleaning process, it’s essential to understand why regular maintenance is crucial. A dirty shaver blade not only compromises the quality of your shave but can also lead to skin irritation and the accumulation of bacteria. Over time, hair, skin cells, and product residue build up on the blades and within the shaver head, impacting both the efficiency and hygiene of the device. By incorporating regular cleaning into your grooming routine, you can avoid these issues and enjoy a consistently smooth and irritation-free shave.
Gather Your Materials:
To start the cleaning process, gather the necessary materials. Having the right tools at your disposal ensures a thorough and effective cleaning routine. The following items are commonly used for cleaning electric shaver blades:
- Small brush: A soft-bristled brush is ideal for removing loose hairs and debris from the surface of the shaver.
- Isopropyl alcohol: An effective disinfectant, isopropyl alcohol helps to sanitize the blades and shaver head.
- Cotton swabs: Perfect for reaching small and intricate parts of the shaver for detailed cleaning.
- Small bowl of water: Essential for rinsing off the shaver head during the cleaning process.
- Towel or cloth: To dry the shaver thoroughly before reassembly.
Preparing the Electric Shaver:
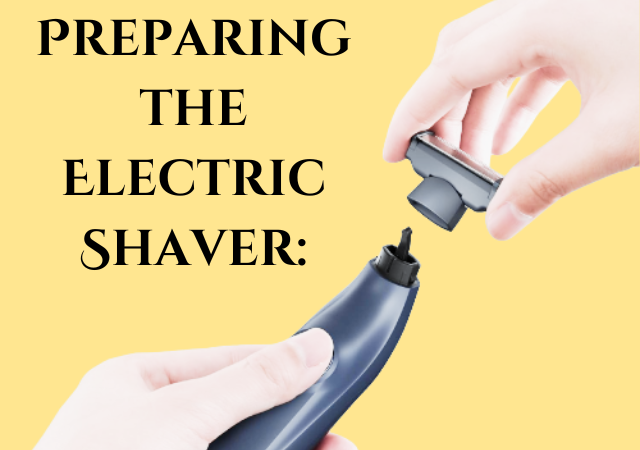
Before beginning the cleaning process, it’s crucial to turn off and unplug the electric shaver to ensure safety. Remove any loose hairs or debris from the surface using the small brush. This preliminary step makes the subsequent cleaning process more effective by eliminating large particles that may hinder access to smaller areas.
Disassembling the Shaver:
Refer to the manufacturer’s instructions for your specific electric shaver model and follow the recommended steps for disassembly. This may involve removing the shaver head or cutting unit to access the blades and interior components for a more thorough cleaning. Carefully follow the instructions to avoid damaging any parts during disassembly.
Brushing off Loose Debris:
Using the small brush, gently sweep away any loose hairs and debris from the shaver blades and surrounding areas. Pay close attention to hard-to-reach areas and crevices where buildup is common. This step prepares the shaver for a more in-depth cleaning by eliminating surface-level dirt and debris.
Cleaning with Isopropyl Alcohol:
Dampen a cotton swab with isopropyl alcohol and carefully wipe down the shaver blades and cutting elements. The alcohol not only cleans the blades but also serves as a disinfectant, eliminating bacteria and preventing infections or skin irritations. Use additional alcohol-soaked cotton swabs to clean the interior of the shaver head, reaching areas that may be difficult to access with a brush.
Allow the alcohol to evaporate completely before reassembling the shaver to ensure that no residue is left behind. This step not only cleans but also sanitizes the shaver, promoting a hygienic shaving experience.
Rinsing the Shaver Head:
After the alcohol has evaporated, rinse the shaver head under running water to remove any remaining residue. Ensure that water reaches all parts of the shaver head, flushing out debris and leftover cleaning solution. Shake off excess water and allow the shaver head to air dry completely before proceeding to the next step.
Lubricating the Blades:
Apply a small amount of lubricant to the shaver blades, following the manufacturer’s recommendations for the type of lubricant to use. Lubrication reduces friction between the blades, enhancing their performance and extending their lifespan. Turn on the shaver briefly to allow the lubricant to distribute evenly across the blades. This step is essential for maintaining the smooth operation of the shaver and preventing premature wear and tear.
Reassembling the Electric Shaver:
Carefully reattach the shaver head or cutting unit, following the manufacturer’s instructions for proper reassembly. Ensure that all components are securely in place to guarantee the shaver’s functionality. Skipping or improperly executing this step may lead to reduced performance or damage to the device.
Final Steps:
Wipe down the exterior of the shaver with a dry cloth to remove any remaining moisture. Check that all parts are clean, dry, and securely in place before plugging in and turning on the shaver. Confirm that the device operates smoothly and efficiently, signaling the successful completion of the cleaning process.
Maintenance Tips:
To further enhance the performance and longevity of your electric shaver blade, consider the following maintenance tips:
- Establish a regular cleaning schedule: Set a routine for cleaning your electric shaver to prevent the buildup of debris and maintain optimal performance.
- Replace blades and foils as recommended: Follow the manufacturer’s guidelines for blade and foil replacement. Overused or dull blades can compromise the quality of your shave.
- Store the shaver in a clean, dry place: When not in use, store your electric shaver in a location free from moisture and debris. This helps prevent the growth of bacteria and ensures a clean shaving experience each time.
Conclusion
In conclusion, getting the hang of keeping your electric shaver blades in top shape is a straightforward but crucial part of personal grooming. Just weave regular cleaning into your usual routine and follow the steps we’ve covered. This ensures your electric shaver works its best, consistently giving you a smooth and comfy shave. Investing a few minutes in proper cleaning pays off big time – think improved performance, a longer-lasting shaver, and an all-around better grooming experience. So, wave goodbye to the hassle of clogged blades and say hello to the satisfaction of a well-kept electric shaver.

My name is Rohit Vagh and I’m a content writer specializing in fashion and lifestyle. I have three years of experience in this field and have written various articles. My writing style is creative and engaging, and I strive to create content that resonates with my readers. I have a deep passion for fashion and am constantly researching the latest trends and styles to make sure my readers are up to date. I’m excited to continue my career in blogging, and I’m always looking for new opportunities in the fashion and lifestyle space.