Don’t Pay a Penny for Gel Polish Removal Again – Learn How Now!
Introduction
Are you tired of spending your hard-earned money at the nail salon just to have your gel nail polish removed? If so, you’re not alone. Many of us love the long-lasting beauty of gel nails but dread the thought of the hefty salon bills that accompany them. The good news is, you don’t have to empty your wallet every time you want to change your nail color or maintain your nail health.
In this article, we’re about to let you in on a little secret that will change the way you think about gel nail polish removal. Say goodbye to those expensive salon visits, as we unveil a simple, cost-effective, and do-it-yourself method that will have your nails looking fresh and healthy without breaking the bank. By the end of this guide, you’ll have all the tools and knowledge you need to master the art of gel nail polish removal in the comfort of your own home. Get ready to save money and make your nails shine – it’s time to learn how now!
The Problem with Salon Visits
Let’s face it, while gel nails are stunning and durable, the maintenance costs can add up quickly. Visiting a salon for gel nail removal typically costs as much as applying a new gel manicure, effectively doubling your expenses. This financial strain often discourages people from experimenting with different nail colors and styles, leaving them stuck with their current polish for longer than they’d like.
Moreover, salon appointments eat away at your precious time. Scheduling, traveling, and waiting for your turn at the salon can be tedious and inconvenient. Wouldn’t it be great if you could skip all of that and still have gorgeous, well-kept nails?
The Solution: DIY Gel Nail Polish Removal
The solution to this predicament is simple: take the gel polish removal process into your own hands. By learning how to remove gel nail polish at home, you not only save a substantial amount of money but also gain the freedom to change your nail color whenever you desire. With the right techniques and some basic tools, you can master the art of gel polish removal in no time.
Step 1: Gathering Supplies
Before you begin the gel polish removal process, it’s essential to gather all the necessary supplies. You’ll need acetone, cotton balls or pads, aluminum foil, a nail file, a cuticle pusher, and cuticle oil. Additionally, you may want to protect the skin around your nails by applying petroleum jelly or wearing disposable gloves.
Step 2: Gentle Filing
Start by gently filing the top layer of your gel nail polish. This step is essential because it allows the acetone to penetrate the layers underneath. Use a soft nail file to buff the shine off the top coat without damaging your natural nails.
Step 3: Creating Aluminum Foil Wraps
Cut small squares of aluminum foil and prepare cotton balls or pads by cutting them into small pieces. You’ll need one piece for each nail.
Step 4: Soaking Nails
Soak the cotton balls or pads in acetone and place one on top of each nail. Wrap the foil around your fingertip to secure the cotton in place. This method helps to create a barrier between the acetone and the surrounding skin, reducing the risk of irritation.
Step 5: Checking Progress
Wait for about 10-15 minutes, then carefully unwrap one finger to check if the gel polish has started to lift. If it hasn’t, rewrap the foil and wait a few more minutes. Be patient; rushing this process can damage your natural nails.
Step 6: Removing Softened Gel
Once the gel has softened and started to lift, use a cuticle pusher to gently push the gel polish off your nail. Be gentle and avoid excessive scraping, as this can cause damage to your natural nails.
Step 7: Moisturizing and Buffing
After removing the gel polish, apply cuticle oil to rehydrate your nails and the surrounding skin. Lightly buff your nails to smooth out any remaining residue.
Step 8: Final Cleanup
Finally, use a clean cotton ball or pad dipped in acetone to remove any last traces of gel polish from your nails. Be thorough, but gentle, as the gel should come off easily after the initial removal steps.
The Acetone Alternative
If you’d prefer an even quicker method, you can use pure acetone to remove your gel nail polish. Here’s how to do it:
Step 1: Gentle Filing
As with the previous method, start by gently filing the top layer of your gel nail polish to remove the shiny top coat.
Step 2: Protecting the Skin
To prevent acetone from irritating the skin around your nails, apply a thin layer of petroleum jelly or wear disposable gloves.
Step 3: Soaking Nails
Prepare a small bowl with enough acetone to submerge your fingertips. Soak your nails in the acetone for about 10-15 minutes.
Step 4: Checking Progress
After soaking, use an orangewood stick to test if the gel has started to lift. If it hasn’t, give it a few more minutes.
Step 5: Removing Softened Gel
Once the gel has softened and started to lift, gently push it off your nail using the orangewood stick. Avoid excessive scraping, as this can damage your natural nails.
Step 6: Moisturizing and Buffing
After removing the gel polish, apply cuticle oil to rehydrate your nails and surrounding skin. Lightly buff your nails to smooth out any remaining residue.
Step 7: Final Cleanup
Use a clean cotton ball or pad dipped in acetone to remove any last traces of gel polish from your nails.
Caring for Your Nails After Removal
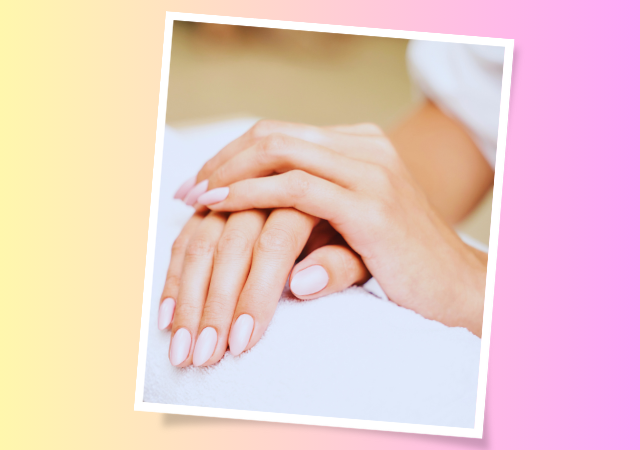
Once you’ve successfully removed your gel nail polish, it’s essential to take proper care of your nails to maintain their health and strength.
Importance of Nail Health
Nail health is crucial, and it’s essential to pay attention to your nails’ well-being. Overuse of gel polish or improper removal techniques can weaken your nails over time.
Applying a Nail Strengthener
Consider using a nail strengthener or a nourishing nail treatment to help your nails recover from the removal process. These products can promote healthy nail growth and prevent breakage.
Giving Your Nails a Break
To maintain healthy nails, avoid reapplying gel polish immediately after removal. Allow your nails to breathe and recover for a few days before applying any new nail polish.
Regular Manicure Routine
Maintaining a regular manicure routine can help keep your nails in excellent condition. Keep your nails clean, well-shaped, and moisturized to prevent damage and promote their overall health.
Conclusion (Don’t Pay a Penny for Gel Polish Removal Again)
By following these simple DIY gel polish removal methods, you can say goodbye to those costly salon visits. You’ll not only save money but also have the flexibility to change your nail color whenever you like. The key is to be patient, gentle, and attentive to your nail health. So, why pay a penny for gel polish removal again when you can easily learn how to do it yourself and enjoy beautiful, healthy nails from the comfort of your own home? Get ready to revolutionize your nail care routine and say hello to affordable, fabulous nails!

My name is Rohit Vagh and I’m a content writer specializing in fashion and lifestyle. I have three years of experience in this field and have written various articles. My writing style is creative and engaging, and I strive to create content that resonates with my readers. I have a deep passion for fashion and am constantly researching the latest trends and styles to make sure my readers are up to date. I’m excited to continue my career in blogging, and I’m always looking for new opportunities in the fashion and lifestyle space.